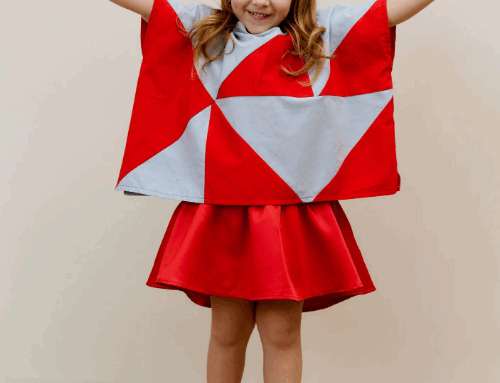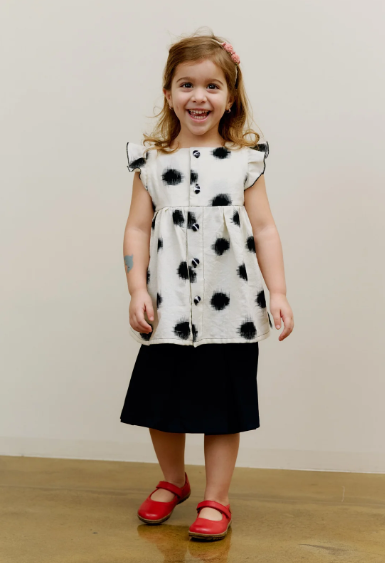
When summer calls for breezy comfort and cheerful charm, the Top Keira answers with sunshine-ready style! Available as a free sewing pattern from Initiative Handarbeit, this sweet little girls’ top is designed with delightful details like a square neckline, cap-style ruffle sleeves, and a gathered skirted hem. Whether you’re mixing fabrics or keeping it simple in cottons and ikats, Top Keira brings playful energy to any warm-weather outfit.
Pattern Details:
Sizes:
98 / 110 / 122 / 134 (approx. 3–9 years)
Fabric Recommendation:
Lightweight woven cotton or ikat fabrics.
Fabric Requirement (fabric width 140 cm):
1.0 meter
Notions:
-
Matching universal sewing thread (e.g., 120 cotton)
-
5 buttons (size 98/110) or 6 buttons (size 122/134), 1.2 cm diameter
-
Small piece of interfacing for buttonholes or placket reinforcement
How to Sew the Top Keira – Step-by-Step Instructions
1. Cut Out the Pieces
All pattern pieces include a 1 cm seam allowance and 2 cm hem.
Cut the following:
-
2x Front Bodice (on the fold)
-
4x Back Bodice
-
2x Sleeve Ruffles
-
1x Front Skirt Panel (on the fold)
-
2x Back Skirt Panels
2. Prepare the Skirt Panels
-
Neaten all edges of the skirt panels except the bottom hems using an overlock or zigzag stitch.
-
Press 1 cm, then another 1 cm at the bottom hem, and topstitch.
3. Add Interfacing
-
Iron interfacing onto the wrong side of both back bodice pieces, along the button placket area.
4. Assemble the Bodice
-
With right sides together, stitch one front bodice piece to two back pieces at the shoulders.
-
Press seams open.
-
Repeat for the other pair (this forms the inner and outer bodice).
5. Attach the Ruffled Sleeves
-
Finish the curved outer edge of each arm ruffle with a tight zigzag stitch.
-
Pin each ruffle to the armhole of the outer bodice, positioning them between the marked notches.
-
Baste in place.
6. Join Inner and Outer Bodice
-
Place the inner and outer bodices right sides together.
-
Stitch around the neckline and armholes, enclosing the ruffles in the seam.
-
Trim seam allowances and snip into curves and corners.
-
Turn the bodice right side out by pulling the back pieces through the shoulder tunnels.
-
Press neatly.
7. Side Seams of the Bodice
-
Align and stitch the side seams of both the inner and outer bodices.
-
Press the seams open.
8. Join the Skirt Panels
-
Stitch the side seams of the front and back skirt panels.
-
For the back opening, fold in the facing edges of the skirt panel 1 cm, then again along the fold line, and press.
9. Attach Skirt to Bodice
-
Pin the outer bodice to the right side of the skirt between the markings.
-
Stitch in place.
-
Press seam allowance upward.
-
Fold the edge of the inner bodice over the seam and stitch it down from the inside by hand or topstitch to conceal the seam neatly.
10. Finish with Buttonholes and Buttons
-
Mark and sew buttonholes along the right side of the back closure.
-
Sew matching buttons to the left side.
Style It Your Way
Make it playful with color-blocked fabrics, or go minimalist with monochrome ikat. Top Keira is just as lovely in florals, polka dots, or classic checks—it’s a versatile favorite that you’ll want to sew again and again!