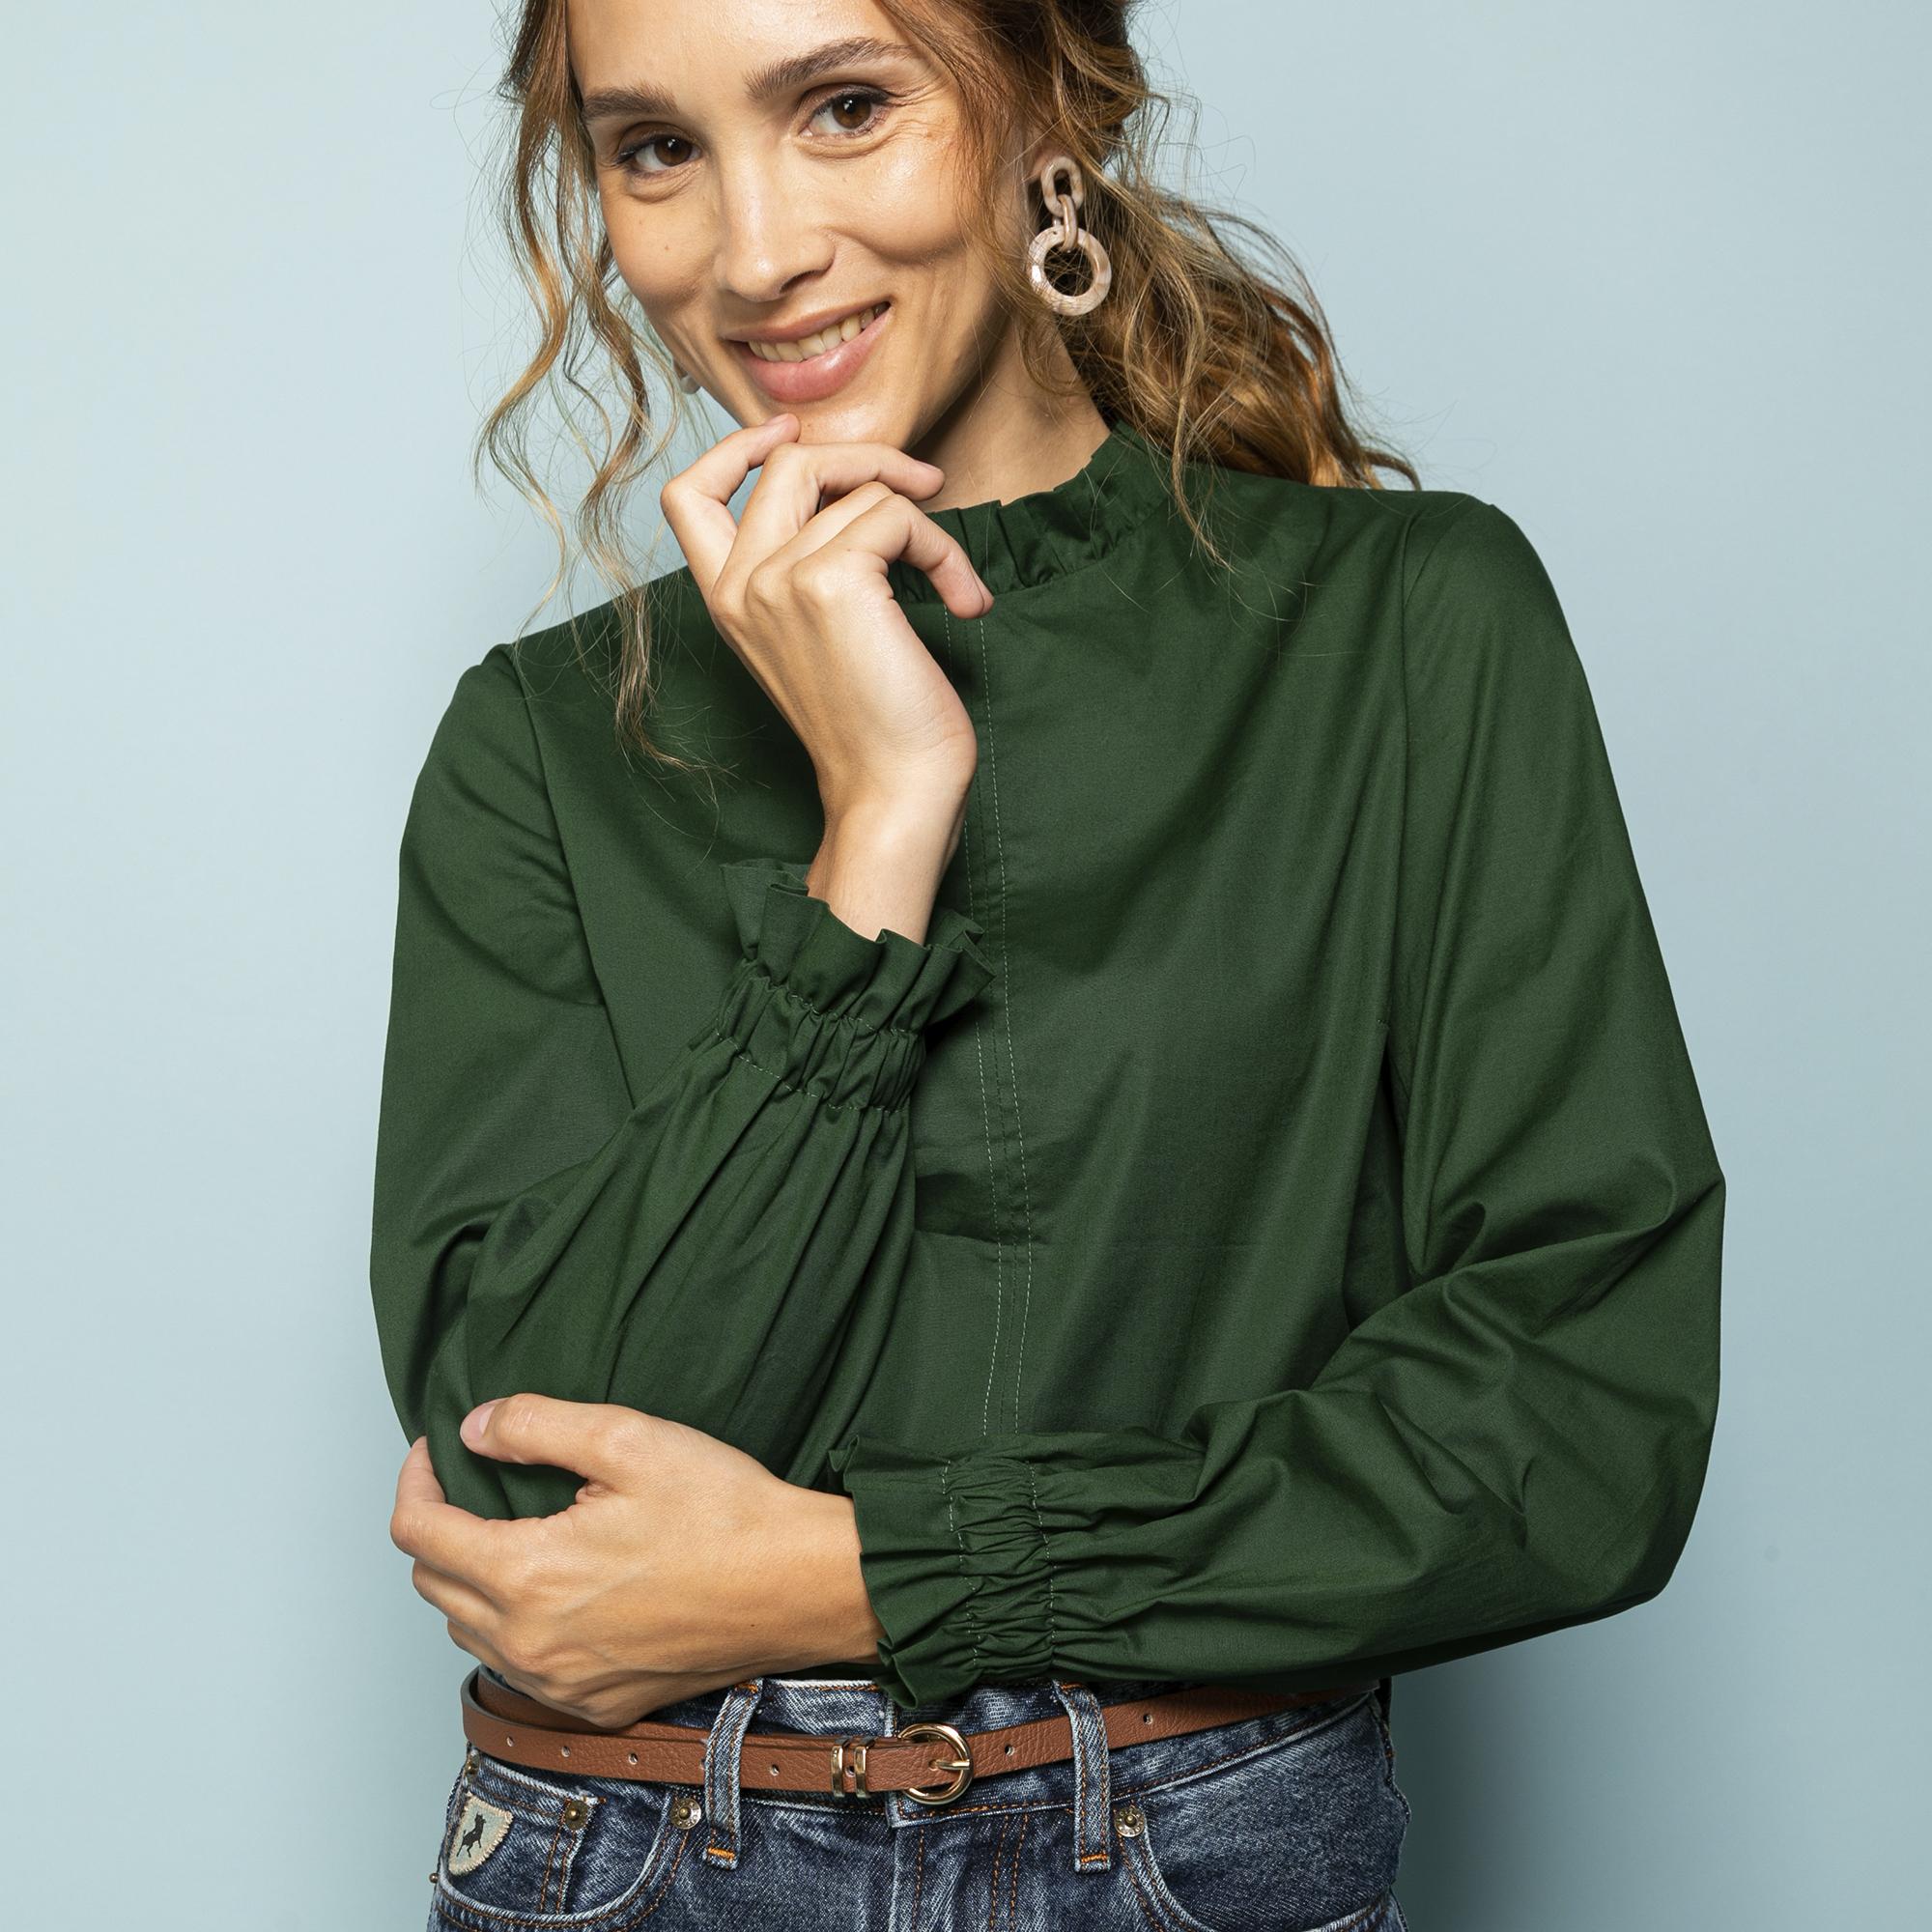
The Top Melle is a free sewing pattern that brings a feminine twist to a simple silhouette through thoughtful details and easy construction. Offered in sizes 34 to 56, this blouse is an accessible and stylish project for sewists of all levels.
With its elegant gathers at the high neckline and sleeves, the Melle top is both refined and wearable. The pattern is designed with a lightly pleated stand collar that adds texture and charm, while the long sleeves are finished with casing and elastic for a subtle puff effect. These gathered elements give the blouse a romantic feel without overwhelming the clean lines of the overall design.
The pattern includes pieces for a front with bust darts, a back with a center slit and button loop closure, a single-piece collar, long sleeves, and neatly finished facings for the neckline. The construction is straightforward, guided by a well-illustrated tutorial, and all seam allowances are included if you select the “cutline” layer.
You’ll need a lightweight woven fabric—cotton with a touch of elastane is ideal for comfort and shape retention. A crisp fabric will enhance the blouse’s volume, while a more fluid fabric will result in softer gathers. The project also requires a small button, lightweight interfacing, and elastic for the sleeves.
Fabric requirements range from 150 cm to 215 cm depending on your size, and the pattern suggests a 140 cm fabric width. The finished back length varies from 56.5 cm to 65 cm across the size range.
Whether you tuck it into high-waisted jeans or layer it under a blazer, the Melle top is a wardrobe staple with personality. It’s a perfect pattern if you love details like gathers and are looking for a blouse that balances charm with wearability.
🧵 Download the free pattern and tutorial here:
👉 Blouse Melle – Femmes d’Aujourd’hui
Available sizes: 34–56
Languages: French (with illustrated instructions)
Skill level: Beginner–Intermediate
Fabric recommendation: Light cotton, poplin, or similar woven fabric
Perfect for your handmade wardrobe or as a gift sewn with love.
🧵 Sewing Instructions – Melle Blouse (Sizes 34–56)
1. Front and Back
-
Transfer the markings from the pattern onto the front (piece A) and back (piece B) using basting stitches.
-
Finish the center front seams (MDV) of A with an overlock or zigzag stitch.
-
Pinch the bust dart markings on the front (A), right sides together. Sew the darts from the edge to the marking. Press darts downward.
-
Pin the center front seams of A together, right sides facing. Sew and press open the seam.
-
Topstitch both sides of the center front seam at 0.5 cm from the seam.
-
Pin the shoulder seams of A and B, right sides together. Sew, finish the seam, and press toward the front (A).
2. Collar
-
Fold the collar (C) in half lengthwise, right sides together. Sew the short sides. Trim the corners, turn right side out, and press the fold.
-
Gather the open edge of collar C: sew two parallel rows of long stitches without backstitching. Gently pull the threads to gather the fabric evenly.
-
Match the collar to the neckline, aligning the notches with shoulder seams and center front. The ends of the collar should stop 0.5 cm from the center back seam (MDS). Secure gathers by wrapping thread ends around a pin. Baste the collar in place within the seam allowance.
3. Facing
-
Mark the notch on the back facing (F) with basting stitches. Use chalk or a fabric pen to draw a line from the neckline center back notch to the basting stitch on the wrong side of F.
-
Finish the shoulder seams of the front facing (E).
-
Pin and sew shoulder seams of facings E and F, right sides together. Press seams open and finish the outer edge of the combined facing.
-
Using chalk or a pen, draw a line from the back neckline notch to the marking on the back piece (B).
-
Make the button loop: Cut a 5 × 3 cm strip from fabric, fold both long edges 0.5 cm toward the wrong side, then fold in half and stitch along the edge. Fold the loop in half and pin it to the left side of the marked center back line, 1.5 cm below the neckline.
-
Pin the inner edge of the facing to the neckline, right sides together, with the collar sandwiched in between. Align shoulder seams and markings carefully.
-
Sew around the neckline. Along the center back line, stitch 0.5 cm on either side of the line and 1 cm horizontally at the bottom to form a slit.
-
Cut along the center back line up to the horizontal seam, then clip diagonally into the corners. Press seam allowance and facing upward, and understitch close to the neckline seam on the facing side.
-
Trim any excess seam allowance. Turn the facing completely to the inside and press the neckline edge neatly.
-
Secure the facing at the shoulders with a few hand stitches. Sew the button to the right top corner of the back, next to the slit.
4. Sleeves
-
Place the sleeve (D) right sides together with the bodice and pin the sleeve cap to the armhole, matching notches: one notch for front, two for back, center for shoulder seam.
-
Sew and finish the armhole seam. Repeat for the other sleeve.
5. Side Seams
-
Pin the side seams of the front (A) and back (B) as well as the underarm seams of the sleeves (D), right sides together. Sew in one continuous seam. Finish and press the seam toward the front.
6. Hem
-
Press the hem of the bodice to the wrong side: first 1 cm, then 2 cm. Stitch in place.
-
Press the sleeve hem to the wrong side along the markings. Stitch 2.5 cm from the edge, then sew a second parallel line, leaving a 2.5 cm opening to insert the elastic.
-
Cut the elastic in two equal pieces. Insert into the sleeve casing, overlap and sew the ends, then pull into place. Close the opening.
7. Final Press
-
Give the entire blouse a good press—and you’re done!

